Saturday, November 26, 2011

How to enable Wampserver when Oracle Agent is Running

First of all both Wampserver and Oracle Sql PLus utilises the same web server Apache .Since you have installed both the oracle and the wampserver suite .. it means that you have installed Apache Web Server two times .
Databases Normalization E Book(R. Comprehensive EBook(R) On Normalization Techniques For General Relational Databases Such As Oracle, Sql Server And Others.!
The one which is installed recently will be working fine and the firstly installed suite will not work since it will be disabled by the recently installed suite.
Or else the Oracle will work fine since the oracle agent and the oracle HTTP server will be activated while booting . Since wampserver is activated only when th developer starts it , it will show that the wampserver is offline in the quick launch toolbar .
For rectifying this problem,Do the following steps:-
Step 1:
Start the Wampserver and wait for the wampserver icon to launch in the quick launch toolbar.Then click on the icon anselect -> localhost.


Step 2:
Step 1 results in the following page.

Step 3:
Oracle 10g Database, Oracle 9i, Oracle 11g, Oracle 11i & Oracle R12 Student Guides.
Now select the following Wampserver icon -> Apache ->httpd.conf

Step 4:
Now the httpd.conf file opens ,then search for the text listen and then change the port no Listen 80 to
ip address:8080
Listen 8080
as shown below in the image


Step 5:
Now restart the wampserver and click put online if the below screen is displayed.

Step 6:
If that doesnt work out, do this and stop the Oracle services which are automatic as shown below..


Step 7:
Then repeat the step 5 .Then click on the icon anselect -> localhost.
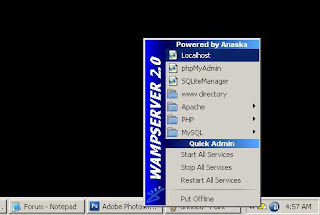
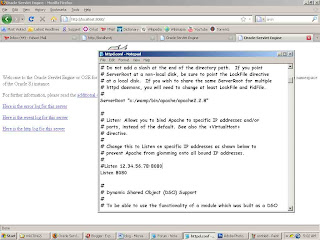
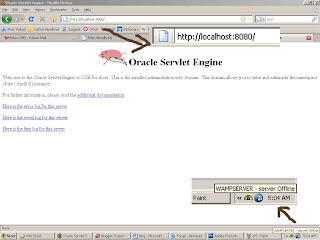
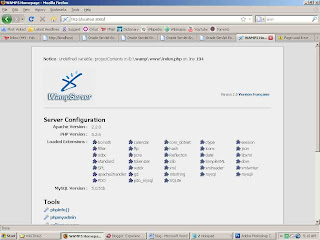
I hope ur wampserver works fine ... if u still have doubt comment here ...
How to enable Wampserver when Oracle Agent is RunningSocialTwist Tell-a-Friend

Friday, September 16, 2011

Manual Database Creation Oracle 11g

Manually Database Creation is one of the most important works of aDBA.

The procedure is same as previous which we are used for 9i, 10g.

In this database creation I used below features

1. OMF (Oracle Managed File) for datafiles, redolog files & controlfiles
2. FRA (Flash Recovery Area) for Archivelog or backup files


1. Create Required Directories


Microsoft Windows XP [Version 5.1.2600]
(C) Copyright 1985-2001 Microsoft Corp.

C:\Documents and Settings\UserXP>mkdir D:\app\UserXP\admin\mandb11g


2. Set Enviourment Variable (ORACLE_HOME,ORACLE_SID,PATH)


C:\Documents and Settings\UserXP>set ORACLE_HOME=D:\app\UserXP\product\11.1.0\db
_1
C:\Documents and Settings\UserXP>set PATH=D:\app\UserXP\product\11.1.0\db_1\BIN

C:\Documents and Settings\UserXP>set ORACLE_SID=mandb11g


3. Creating INIT.ORA parameter file 
Set minimum required parameter in INIT.ora file.

Open NOTEPAD file and set below parameters

db_name = 'MANDB11G'
#Database name.

db_create_file_dest='D:\app\UserXP\oradata\mandb11g\data'
#OMF configuration for Datafile,controlfile
db_create_online_log_dest_1='D:\app\UserXP\oradata\mandb11g\redo'
#OMF configuration for redolog file

db_recovery_file_dest='D:\app\UserXP\oradata\mandb11g\flash_recovery'
db_recovery_file_dest_size=4G
#FRA (FLASH RECOVERY AREA configuration)

diagnostic_dest='D:\app\UserXP\admin\mandb11g'
#It is new feature with 11g for trace files (bdump,udump,cdump or many others
#folder created in "DIAG" folder inside "D:\app\UserXP\admin\mandb11g" folder.

Save it in Temporary folder.

4. Create an Instance

C:\Documents and Settings\UserXP>oradim -new -sid mandb11g -startmode auto
Instance created.

5. Connect to an Instance

C:\Documents and Settings\UserXP>sqlplus /nolog

SQL*Plus: Release 11.1.0.7.0 - Production on Tue Aug 9 05:49:42 2011

Copyright (c) 1982, 2008, Oracle.  All rights reserved.

SQL> conn / as sysdba
Connected to an idle instance.

6. Create Server Parameter file (SPFILE)
 
SQL> create spfile from pfile='D:\init.ora';

File created.

7. Start the Instance

SQL> startup nomount
ORACLE instance started.

Total System Global Area  150667264 bytes
Fixed Size                  1345868 bytes
Variable Size              92276404 bytes
Database Buffers           50331648 bytes
Redo Buffers                6713344 bytes

7. Start the Instance
 
SQL> create database mandb11g;

Database created.

9. Create Temporary and Additional Tablespace

SQL> create temporary tablespace temp tempfile size 5m;

Tablespace created.


SQL> create tablespace userdata datafile size 10m autoextend on;

Tablespace created.

SQL> alter database default temporary tablespace temp;

Database altered.

SQL> alter database default tablespace userdata;

Database altered.


SQL> shutdown immediate
Database closed.
Database dismounted.
ORACLE instance shut down.
SQL> startup mount
ORACLE instance started.

Total System Global Area  150667264 bytes
Fixed Size                  1345868 bytes
Variable Size              92276404 bytes
Database Buffers           50331648 bytes
Redo Buffers                6713344 bytes
Database mounted.
SQL> alter database archivelog;

Database altered.

SQL> alter database open;

Database altered.

10. Run Scripts to build data dictionary views

@%ORACLE_HOME%/rdbms/admin/catalog.sql
@%ORACLE_HOME%/rdbms/admin/catproc.sql
@%ORACLE_HOME%/sqlplus/admin/pupbld.sql

11. Change Database Mode from NO-ARCHIVELOG to ARCHIVELOG.

SQL> shutdown immediate;
Database closed.
Database dismounted.
ORACLE instance shut down.

SQL> startup mount
ORACLE instance started.
Total System Global Area 150667264 bytes
Fixed Size 1331740 bytes
Variable Size 92278244 bytes
Database Buffers 50331648 bytes
Redo Buffers 6725632 bytes
Database mounted.
SQL> alter database ARCHIVELOG;
Database altered.
SQL> alter database OPEN;
Database altered.

NOTE: It is recommended to run database in ARCHIVELOG MODE

12. Check all database files

SQL> select NAME from v$datafile
  2  union all
  3  select NAME from v$controlfile
  4  union all
  5  select MEMBER from v$logfile;

NAME
--------------------------------------------------------------------------------

D:\APP\USERXP\ORADATA\MANDB11G\DATA\MANDB11G\DATAFILE\O1_MF_SYSTEM_741CP7KL_.DBF

D:\APP\USERXP\ORADATA\MANDB11G\DATA\MANDB11G\DATAFILE\O1_MF_SYSAUX_741CPC5V_.DBF

D:\APP\USERXP\ORADATA\MANDB11G\DATA\MANDB11G\DATAFILE\O1_MF_SYS_UNDO_741CPFMK_.D

BF

D:\APP\USERXP\ORADATA\MANDB11G\DATA\MANDB11G\DATAFILE\O1_MF_USERDATA_741CY41G_.D

BF

D:\APP\USERXP\ORADATA\MANDB11G\REDO\MANDB11G\CONTROLFILE\O1_MF_741CP37T_.CTL
D:\APP\USERXP\ORADATA\MANDB11G\REDO\MANDB11G\ONLINELOG\O1_MF_1_741CP3PG_.LOG
D:\APP\USERXP\ORADATA\MANDB11G\REDO\MANDB11G\ONLINELOG\O1_MF_2_741CP5D6_.LOG

7 rows selected.

SQL>
Manual Database Creation Oracle 11gSocialTwist Tell-a-Friend

Wednesday, August 31, 2011

RMAN Backup and Recovery Scenarios in Oracle

Complete Closed Database Recovery. System tablespace is missing

If the system tablespace is missing or corrupted the database cannot be started up so a complete closed database recovery must be performed.
Pre requisites: A closed or open database backup and archived logs.
1. Use OS commands to restore the missing or corrupted system datafile to its original location, ie:
cp -p /user/backup/uman/system01.dbf /user/oradata/u01/dbtst/system01.dbf
2. startup mount;
3. recover datafile 1;
4. alter database open;

Complete Open Database Recovery. Non system tablespace is missing
If a non system tablespace is missing or corrupted while the database is open, recovery can be performed while the database remain open.
Pre requisites: A closed or open database backup and archived logs.
1. Use OS commands to restore the missing or corrupted datafile to its original location, ie:
cp -p /user/backup/uman/user01.dbf /user/oradata/u01/dbtst/user01.dbf
2. alter tablespace offline immediate;
3. recover tablespace ;
4. alter tablespace online;

Complete Open Database Recovery (when the database is initially closed).Non system tablespace is missing
If a non system tablespace is missing or corrupted and the database crashed,recovery can be performed after the database is open.
Pre requisites: A closed or open database backup and archived logs.
1.   startup; (you will get ora-1157 ora-1110 and the name of the missing datafile, the database will remain mounted)
2.   Use OS commands to restore the missing or corrupted datafile to its original location, ie:
cp -p /user/backup/uman/user01.dbf /user/oradata/u01/dbtst/user01.dbf
3.   alter database datafile3 offline; (tablespace cannot be used because the database is not open)
4.   alter database open;
5.   recover datafile 3;
6.   alter tablespace online;

Recovery of a Missing Datafile that has no backups (database is open).
If a non system datafile that was not backed up since the last backup is missing,recovery can be performed if all archived logs since the creation of the missing datafile exist.
Pre requisites: All relevant archived logs.
1.   alter tablespace offline immediate;
2.   alter database create datafile ‘/user/oradata/u01/dbtst/newdata01.dbf’;
3.   recover tablespace ;
4.   alter tablespace online;
If the create datafile command needs to be executed to place the datafile on a location different than the original use:
alter database create datafile ‘/user/oradata/u01/dbtst/newdata01.dbf’ as ‘/user/oradata/u02/dbtst/newdata01.dbf’

Restore and Recovery of a Datafile to a different location.
If a non system datafile is missing and its original location not available, restore can be made to a different location and recovery performed.
Pre requisites: All relevant archived logs.
1.    Use OS commands to restore the missing or corrupted datafile to the new location, ie:
cp -p /user/backup/uman/user01.dbf /user/oradata/u02/dbtst/user01.dbf
2.    alter tablespace offline immediate;
3.    alter tablespace rename datafile ‘/user/oradata/u01/dbtst/user01.dbf’ to ‘/user/oradata/u02/dbtst/user01.dbf’;
4.    recover tablespace ;
5.    alter tablespace online;

Control File Recovery
Always multiplex your controlfiles. Controlfiles are missing, database crash.
Pre requisites: A backup of your controlfile and all relevant archived logs.
1.    startup; (you get ora-205, missing controlfile, instance start but database is not mounted)
2.    Use OS commands to restore the missing controlfile to its original location:
cp -p /user/backup/uman/control01.dbf /user/oradata/u01/dbtst/control01.dbf
cp -p /user/backup/uman/control02.dbf /user/oradata/u01/dbtst/control02.dbf
3.    alter database mount;
4.    recover automatic database using backup controlfile;
5.    alter database open resetlogs;
6.    make a new complete backup, as the database is open in a new incarnation and previous archived log are not relevant.

Incomplete Recovery, Until Time/Sequence/Cancel
Incomplete recovery may be necessaire when an archived log is missing, so recovery can only be made until the previous sequence, or when an important object was dropped, and recovery needs to be made until before the object was dropped.
Pre requisites: A closed or open database backup and archived logs, the time or sequence that the ‘until’ recovery needs to be performed.
1.  If the database is open, shutdown abort
2.  Use OS commands to restore all datafiles to its original locations:
cp -p /user/backup/uman/u01/*.dbf /user/oradata/u01/dbtst/
cp -p /user/backup/uman/u02/*.dbf /user/oradata/u01/dbtst/
cp -p /user/backup/uman/u03/*.dbf /user/oradata/u01/dbtst/
cp -p /user/backup/uman/u04/*.dbf /user/oradata/u01/dbtst/
etc…
3.  startup mount;
4.  recover automatic database until time ’2004-03-31:14:40:45′;
5.  alter database open resetlogs;
6.  make a new complete backup, as the database is open in a new incarnation and previous archived log are not relevant.Alternatively you   may use instead of until time, until sequence or until cancel:
recover automatic database until sequence 120 thread 1; OR
recover database until cancel;

Rman Recovery Scenarios
Rman recovery scenarios require that the database is in archive log mode, and that backups of datafiles, control files and archived redolog files are made using Rman. Incremental Rman backups may be used also.
Rman can be used with the repository installed on the archivelog, or with a recovery catalog that may be installed in the same or other database.
Configuration and operation recommendations:
Set the parameter controlfile autobackup to ON to have with each backup a
controlfile backup also:
configure controlfile autobackup on;
set the parameter retention policy to the recovery window you want to have,
ie redundancy 2 will keep the last two backups available, after executing delete obsolete commands:
configure retention policy to redundancy 2;
Execute your full backups with the option ‘plus archivelogs’ to include your archivelogs with every backup:
backup database plus archivelog;
Perform daily maintenance routines to maintain on your backup directory the number of backups you need only:
crosscheck backup;
crosscheck archivelog all;
delete noprompt obsolete backup;
To work with Rman and a database based catalog follow these steps:
1. sqlplus /
2. create tablespace repcat;
3. create user rcuser identified by rcuser default tablespace repcat temporary tablespace temp;
4. grant connect, resource, recovery_catalog_owner to rcuser
5. exit
6. rman catalog rcuser/rcuser          # connect to rman catalog as the rcuser
7. create catalog                     # create the catalog
8. connect target /                   #

Complete Closed Database Recovery. System tablespace is missing
In this case complete recovery is performed, only the system tablespace is missing,so the database can be opened without reseting the redologs.
1.  rman target /
2.  startup mount;
3.  restore database;
4.  recover database;
5.  alter database open;
Complete Open Database Recovery. Non system tablespace is missing,database is up
1.   rman target /
2.   sql ‘alter tablespace offline immediate’;
3.   restore datafile 3;
4.   recover datafile 3;
5.   sql ‘alter tablespace online’;

Complete Open Database Recovery (when the database is initially closed).Non system tablespace is missing
A user datafile is reported missing when tryin to startup the database. The datafile can be turned offline and the database started up. Restore and recovery are performed using Rman. After recovery is performed the datafile can be turned online again.
1.    sqlplus /nolog
2.    connect / as sysdba
3.    startup mount
4.    alter database datafile ‘’ offline;
5.    alter database open;
6.    exit;
7.    rman target /
8.    restore datafile ‘’;
9.    recover datafile ‘’;
10.   sql ‘alter tablespace online’;

Recovery of a Datafile that has no backups (database is up).
If a non system datafile that was not backed up since the last backup is missing,recovery can be performed if all archived logs since the creation of the missing datafile exist. Since the database is up you can check the tablespace name and put it offline. The option offline immediate is used to avoid that the update of the datafile header.
Pre requisites: All relevant archived logs.
1.    sqlplus ‘/ as sysdba’
2.    alter tablespace offline immediate;
3.    alter database create datafile ‘/user/oradata/u01/dbtst/newdata01.dbf;
4.    exit
5.    rman target /
6.    recover tablespace ;
7.    sql ‘alter tablespace online’;
If the create datafile command needs to be executed to place the datafile on a location different than the original use:
alter database create datafile ‘/user/oradata/u01/dbtst/newdata01.dbf’ as ‘/user/oradata/u02/dbtst/newdata01.dbf’

Restore and Recovery of a Datafile to a different location. Database is up.
If a non system datafile is missing and its original location not available, restore can be made to a different location and recovery performed.
Pre requisites: All relevant archived logs, complete cold or hot backup.
1.    Use OS commands to restore the missing or corrupted datafile to the new location, ie:
cp -p /user/backup/uman/user01.dbf /user/oradata/u02/dbtst/user01.dbf
2.    alter tablespace offline immediate;
3.    alter tablespace rename datafile ‘/user/oradata/u01/dbtst/user01.dbf’ to ‘/user/oradata/u02/dbtst/user01.dbf’;
4.    rman target /
5.    recover tablespace ;
6.    sql ‘alter tablespace online’;

Control File Recovery
Always multiplex your controlfiles. If you loose only one controlfile you can replace it with the one you have in place, and startup the Database. If both controlfiles are missing, the database will crash.
Pre requisites: A backup of your controlfile and all relevant archived logs. When using Rman alway set configuration parameter autobackup of controlfile to ON. You will need the dbid to restore the controlfile, get it from the name of the backed up controlfile.It is the number following the ‘c-’ at the start of the name.
1.   rman target /
2.   set dbid
3.   startup nomount;
4.   restore controlfile from autobackup;
5.   alter database mount;
6.   recover database;
7.   alter database open resetlogs;
8.   make a new complete backup, as the database is open in a new incarnation and previous archived log are not relevant.

Incomplete Recovery, Until Time/Sequence/Cancel
Incomplete recovery may be necessaire when the database crash and needs to be recovered, and in the recovery process you find that an archived log is missing. In this case recovery can only be made until the sequence before the one that is missing.
Another scenario for incomplete recovery occurs when an important object was dropped or incorrect data was committed on it.
In this case recovery needs to be performed until before the object was dropped.
Pre requisites: A full closed or open database backup and archived logs, the time or sequence that the ‘until’ recovery needs to be performed.
1.   If the database is open, shutdown it to perform full restore.
2.   rman target \
3.   startup mount;
4.   restore database;
5.   recover database until sequence 8 thread 1; # you must pass the thread, if a single instance will always be 1.
6.  alter database open resetlogs;
7.  make a new complete backup, as the database is open in a new incarnation and previous archived log are not relevant.Alternatively you may use instead of until sequence, until time, ie: ’2004-12-28:01:01:10′.
RMAN Backup and Recovery Scenarios in OracleSocialTwist Tell-a-Friend

Sunday, June 26, 2011

How to Install Windows XP from a USB Flash Drive

How to Install Windows XP from a USB Flash Drive


What do you do when there is no optical drive in your PC or Laptop and you want to install a Windows XP on it? You can use a USB drive to do the same. Here is a detailed step by step procedure to install Windows XP from a USB Flash Drive in your computer. Before we Install, we should create a bootable USB flash drive with Windows XP loaded into it. This will be required if we want to reinstall the OS.

Install Windows XP from a USB Flash Drive


In order to install Windows XP from a flash drive, first you should dump your OS into this thumb drive. In order to do that, you will need
  • a desktop or laptop with Windows XP/Vista/7
  • An optical drive  in  the PC.
  • The original Windows XP or Vista or Windows 7 installation disk.
  • A USB flash drive  for Windows OS.
  • A software called  ‘Komku-SP-usb.exe’ 
Here is the procedure to make the USB Flash Drive ready i.e., to make it bootable.

Step 1: Download and install ‘Komku’

Download  the software ‘Komku-SP-usb.exe’ from this link and execute  it. The executable file will extract  the necessary utilities  to a  folder called  ‘C:komku’.

STEP 2: Prepare the USB drive

Once  the package has been extracted, go to the folder  ‘C:komkuPeToUSB’ using Windows Explorer. Execute  the file ‘PeToUSB.exe’.  Plug in the USB flash drive and make sure you choose  the  following (see  image below) before clicking  the start button.
Select ‘USB  removable’, ‘Enable Disk Format’, ‘Quick  format’,  ‘Enable LBA (Fat  16x)’ and finally give the drive a name under ‘Drive Label’. Once it’s done, click start to let the utility format the drive.
preparing USB drive

STEP 3: Copy the boot sector to the USB flash drive

Next you will need to start  the command prompt. Click ‘Start > Run’, type  ‘cmd’ and press [Enter]. Then go to  the ‘bootsect’ directory by typing the command ‘cd  C:komkubootsect’ and pressing [Enter].
Now type the command ‘bootsect  /nt52  F:’ and press [Enter]. (The ‘F:’ is the USB flash drive letter represented in ‘My Computer’. Check to verify the drive letter used by your USB flash drive). Let the utility do the needful. Do not exit the Command Prompt yet.

STEP 4: Launch the ‘USB_prep8′ utility.

Now you will need  to change  to the directory  ‘Usb_Prep8’ by using  the command ‘cd  C:komkuusb _ prep8’ and pressing [Enter].
Here execute the command  ‘usb _ prep8’ and press [Enter]. Press any key to continue and you will see a welcome screen with a menu appear in the Command Prompt.
USB prep utility 

STEP 5: Enter the source path for the Windows XP CD.

Now at  this stage, you will have to insert  the Windows XP installation disk into your optical drive. At  the Command Prompt menu, type ‘1’ and press [Enter]. A new popup will appear asking you to choose the location (path) of  the Windows installation disk.
Select the optical drive and click ‘OK’. Next choose ‘2’ from  the menu and change the drive letter to any drive letter which has not been taken. It is drive ‘T:’ by default and you can ignore this step unless you do have a ‘T:’ drive on your computer. After this, choose ‘3’ from the menu and enter the drive letter of your USB flash drive (in this case it would be ‘F’).
 Enter the source path for the Windows XP CD.
Finally choose ‘4’ from the menu and press [Enter]. Wait  for a  few seconds for the process to complete and you will see a prompt to allow  the utility to format  the USB fash drive. Type ‘Y’ and then press [Enter] at this stage to let the utility proceed and install the necessary files from the Windows XP installation disk to the USB flash drive. This process will  take a  few minutes and depends on the speed of  the flash drive.

STEP 6: Allow the utility to copy the data to the drive

After  the files are copied, you will see a popup window asking you for permission  to copy files from  the  temp drive to the USB flash drive. Select ‘Yes’.

STEP 7: Allow the changes to allocate a drive letter.

Next  there will be another popup window asking you to allow the utility  to change  the boot drive  letter of the USB flash drive  from  ‘F:’ to ‘U:’. Select ‘Yes’.
Allow the changes to allocate a drive letter.

STEP 8: Unmount the virtual drive.

Finally, after all  the processes are complete, you will see yet another popup window asking if you want  to unmount  the virtual drive. Select  ‘Yes’. Exit  the Command Prompt now and you will see  that your flash drive  is  ready  to install Windows XP  to another computer.
To  install Windows XP to the computer, you will have  to do the following steps..
  • Go to the BIOS and enable the option of booting  from a USB removable device. This option  is usually found under  the boot sequence menu of  the BIOS.
  • Plug  in  the USB drive to the computer before you  turn it on.
  • Now your computer will boot from the USB flash drive and will be ready to install Windows XP.
  • Follow  the necessary steps  to  install Windows XP and your computer will be up, raring and ready  to go and running Windows in no  time. This is an easy and better way to install your Operating System as a USB port is available on every system.
How to Install Windows XP from a USB Flash DriveSocialTwist Tell-a-Friend

How to install Windows XP from USB flash drive

How to install Windows XP from USB flash drive Part-I

At first download the software Win to Flash . It does not need the installation. After running the setup file the following screen will appear.
install-xp-from-usb-flash-drive-1
From Task tab you can chose your task.
install-xp-from-usb-flash-drive-2
After choosing task press next .
install-xp-from-usb-flash-drive-3
Select the source path of the windows installation disk or copy and then the path of your USB flash drive.
install-xp-from-usb-flash-drive-4
Now the exact bootable copy will be made in the USB Flash drive.
You can now install Windows XP from Flash drive.It is pretty easy method to install Windows XP from your Usb flash drive.If any problem arises then contact us.You can also manually build your USB flash drive enabled for installing XP in it.
But that process is quite complex and so I recommend the process Install Windows XP from USB Flash Drive part-II. Any question or suggestion is always welcome.

Install Windows XP From USB Flash Drive Part-II


I previously wrote an article Install Windows XP from USB Flash/Pen Drive part-I. This process allows you make a USB flash disk/drive bootable and exactly the same as the XP installation CD.

To make the whole process you should have a PC/Computer/Laptop with CD/DVD Rom. Once you make your USB drive ready to boot windows  XP setup from it then you can start Installing Windows XP from that USB Disk/drive in any computer.
Also read how to Install Any Software You need In Your USB Flash Drive With Mojopac.
I shall describe the process how to make the USB drive ready to install XP in your computer step by step.
Requirements:
1. At first you have to get a USB flash drive/disk(at least 1 GB).
2. XP_FROM_USB.rar from the given link below:
Download link
Update: You should have XP installed computer for this process.

The procedure

1. Extract the XP_FROM_USB.rar archive in a folder named Softslas(Say) in C: drive.
Now navigate to C:\Softslas\PeToUSB\ and double click on the peToUSB.exe
install-windows-xp-from-usb-drive-part-2-2
The appearing window will be like thisinstall-windows-xp-from-usb-drive-part-2-3
Set these:
  • select “USB Removable as Destination Drive”
  • select “Enable Disk Format”
  • select “Quick Format”
  • select “Enable LBA (FAT 16x)”
  • Put  XP-Softslas (or whatever you want) in Drive Label :
Now click Start
Then you will get the message and click yes
install-windows-xp-from-usb-drive-part-2-4 Another message box will again appear and click Yes
install-windows-xp-from-usb-drive-part-2-5
After clicking on “Yes” the USB disk will be formatted.Wait for few seconds and then click on “Ok” and then chose “Close”.
3. Now open the windows Command prompt typing cmd in Start->Run
Now in Command Prompt window type
cd c:\softslas\bootsect and press “Enter”.
Now type the command
bootsect /nt52 I: and press “Enter”
install-windows-xp-from-usb-drive-part-2-6
Then again type “cd..” and press “Enter” and cd usb_prep8 and press “Enter”.
install-windows-xp-from-usb-drive-part-8-3
Now type usb_prep8 and press “Enter”.
install-windows-xp-from-usb-drive-9
4. Press any key to continue.
Now the command prompt window will look like this.
install-windows-xp-from-usb-drive-10
Prepares Windows XP LocalSource for Copy to USB-Drive:
0) Change Type of USB-Drive, currently [USB-stick]
1) Change XP Setup Source Path, currently []
2) Change Virtual TempDrive, currently [T:]
3) Change Target USB-Drive Letter, currently []
4) Make New Tempimage with XP LocalSource and Copy to USB-Drive
5) Use Existing Tempimage with XP LocalSource and Copy to USB-Drive
F) Change Log File – Simple OR Extended, currently [Simple]
Q) Quit
Enter your choice:_
Insert the XP installation CD in you CD/DVD ROM and in command prompt window type 1 and press “Enter”..
A “Browse For Folder” window will appear and here select the CD/DVD drive and then click OK.
Similarly for the choice field enter 2 and if there assigned the letter “T” for your computer then change it otherwise do not alter it. After typing 2 in the choice option it will prompt “Enter Available Virtual Drive Letter”.
Here type a letter that is not any drive letter of your computer.
Let us say S is not a drive letter in your computer. So put S then press “Enter”.
Now it will get back to the Command prompt and then type 3 where it prompts for the choice. Then it will prompt “Please give Target USB-Drive Letter e.g type U”.
install-windows-xp-from-usb-drive-11
Now put your USB drive letter and press “Enter”. Here my USB drive label is “I” so I put “I”.
Now  input 4 and press Enter. It creates the new temporary image  and makes a copy of it to the USB Flash Drive .
Please wait for a few seconds..
A warning message will appear like this:
“WARNING, ALL DATA ON NON-REMOVABLE DISK DRIVE T: WILL BE LOST! Proceed with Format (Y/N)?”
Type Y and press “Enter”.
Please wait………..
After completing Format it will prompt “Press any key to continue” and to continue  hit any key .
Please wait………..
It will again prompt “Press any key to continue” and obviously press any key to continue.
5. Now a message box will appear showing
“Copy TempDrive Files to USB-Drive in about 15 minutes = Yes OR STOP = End Program = No”
install-windows-xp-from-usb-drive-12
Click “Yes”.
Now after this a message box will appear showing “Would you like USB-stick to be preferred Boot Drive U……………….”
Click “Yes”.
The next one asking “Would you like to unmount the Virtual Drive ?”
install-windows-xp-from-usb-drive-13
Click “Yes”.
Now wait some time and press any key…………….
Press any key again to close usb_prep8.
Now your USB you can Install Windows XP from the USB drive.
6. Insert your USB drive in the USB port and Reboot your computer. When starts the computer enter in the BIOS Setup and set the first boot preference as USB Hard Disk.Now Save and Exit from the BIOS Setup. Your computer will again restart and the following screen will appear.
install-windows-xp-from-usb-drive-14
Now Chose The TXT Mode Setup.After completing the partition, formatting and copying file the computer will restart again.
Now chose the GUI Mode Setup Option.
install-windows-xp-from-usb-drive-16 
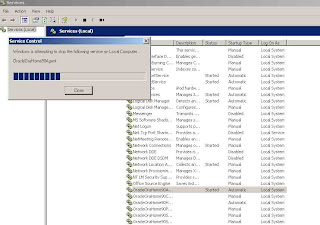
Wait for completing your installation.
I think this will help you to install XP from USB flash disk/drive especially in those computer without CD/DVD ROM.
How to install Windows XP from USB flash driveSocialTwist Tell-a-Friend

Sunday, June 5, 2011

Oracle Background Processes - Oracle 10g


Process Monitor
PMON
Responsible for cleaning up after abnormally terminated connections.
Responsible for monitoring other server processes and restarting them if necessary
Registers the instance with the listener dynamically (dynamic service registration).
Restarts failed server processes and dispatcher processes
System Monitor
SMON
Temporary space cleanup
Crash recovery apon restart
Coalescing free space
Recovering transactions active against unavailable files
Instance recovery of failed node in OPS (Oracle parallel server)
Cleans up OJB$ (Low Level data dictionary)
Shrinks rollback segments
Offline's rollback segments
Other processes call the SMON process when required.
Distributed database recovery
RECO
Recovers transactions that are left in a prepared state because of a crash or loss of connection during a two-phase commit.
Checkpoint process
CKPT
The checkpoint process is charged with instructing the database block buffer writers to write the database buffer cache to disk, it then updates the data file headers and control file to indicate when the checkpoint was performed. There is a relationship with checkpoints and recovery time, the more checkpointing the less recovery time is need when a crash occurs.
The ckpt process does not do the checkpoint but assists with the checkpointing process by updating the file headers of the data files.
A checkpointing process involves the following:
  • Flushing the redo log buffers to the redo log files
  • Writing a checkpoint record to the redo log file
  • Flushing the database log buffers to the data files
  • Updating the data file headers and control files after the checkpoint completes
Database block writer
DBWn
Responsible for writing dirty blocks to disk when free space within the database buffer cache is low, it writes the dirty blocks from the buffer cache out to the disk. It uses the LRU (Least Recently Used) algorithm which retains data in the memory based on how long it has been since someone asked for that data. The database buffer cache is flushed to disk
  • when the database issues a checkpoint
  • when a server process can't find a clean reusable buffer after checking a threshold number of buffers
  • every 3 seconds
  • users process has searched to long for a free buffer when reading a buffer into the buffer cache
  • Instance is shutdown
  • tablespace is put in backup mode or offline
  • segment is dropped
If you have multiple CPU's then it is advised to run multiple database writers. Use the DB_WRITER_PROCESSES parameter to increase the number of database writers, the instance has to be rebooted.
Log writer
LGWR
Responsible for flushing to disk the contents of the redo log buffer located in the SGA. Both committed and uncommitted changes are written to the redo log buffer. The redo log buffer is flushed to disk before the data blocks are written to disk. The redo log buffer is flushed to disk
  • every 3 seconds
  • whenever a user commits a transaction
  • when the redo log buffer is a third full or contains 1 Mb of buffered data
  • before the DBWn process writes when a checkpoint occurs
Archive process
ARCn
Used when the database is in archive-mode, it copies the online redo log file to another location when LGWR fills up, these log files would be used to perform media recovery. There can be a maximum of ten archive processes running ARC0-ARC9. The LOG_ARCHIVE_MAX_PROCESSES parameter determines how many archive processes will be started (default is 1).
Manageability Monitor
MMON
Collects statistics to help the database manage itself. The MMON process collects the AWR (automatic workload repository) snapshot information which is used by the ADDM (automatic database diagnostic monitor), also MMON issues alerts when database thresholds are exceeded.
Manageability Monitor Light
MMNL
The process flushes ASH information to disk when the buffer is full, it also captures session history and database metrics.
Memory Manager
MMAN
Uses the the metrics collected to determine the ideal distribution of memory within oracle. It constantly monitors the database and adjusts the memory allocations according to workloads.
Job Queue Coordination
CJQ0
Used to schedule and run user jobs. It spawns job queue slave processes (J000-J999) which actually run the job.
Job Queue Process
J000-J999
These processes are what actually run the schedule jobs requested by CJQ0.
File Mapping Monitor
FMON
Maps files to immediate storage layers and physical devices. Results are normally kept in the DBMS_STORAGE_MAP view. Generally the 3rd party LVM (logical volume manager) supplier will supply a driver to map to.
Recovery Writer
RVWR
This process is started when you implement flashback logging, it logs the before image (taken from the flashback buffers) of an oracle block before it is changed, this is written to the flashback log files.
Change Tracking Writer
CTWR
This process tracks any data blocks that have changed which then RMAN can use to speed up backups as it will no longer need to read the entire data file to see what has changed.
Queue Monitor Coordinator
QMNC
Spawns and coordinates queue slave processes.
Block server process
BSP
Used in OPS and keeps each servers SGA in the clusters consistent with each other.
Lock monitor process
LMON
Used in OPS and monitors all instances in a cluster to detect a failure of an instance.
Lock manager daemon
LMD
Used in OPS and controls the global locks and global resources for the block buffer cache in a clustered environment.
Lock process
LCKn
Used in OPS and is the same as the LMD daemon but handles requests for all global resources other than database block buffers
Dispatcher process
Dnnn
Dispatcher processes that are used when using a shared server environment
Shared Server process
Snnn
Shared Server processes that are used when using a shared server environment
Oracle process spawner
PSP0
Process spawner has the job of creating and managing other Oracle processes.
Oracle shadow process
SHAD
Oracle's shadow process, could not find much on this process
Streams Advanced Queuing process
q000 - q???
I believe this is something to do with Oracle Streams Advanced Queuing   I believe this is something to do with Oracle Streams Advanced Queuing

Oracle Background Processes - Oracle 10gSocialTwist Tell-a-Friend

Tuesday, January 25, 2011

Gathering Table statistics in Oracle - DBMS_STATS.GATHER_TABLE_STATS

DECLARE
 CURSOR CUR_PARTITION IS
        SELECT TABLE_NAME FROM DBA_TABLES WHERE OWNER = 'SUVIN' AND PARTITIONED ='YES';

CURSOR CUR_NONPARTITION IS
        SELECT OWNER, TABLE_NAME FROM DBA_TABLES WHERE OWNER IN ('SUVIN','RETAIL') AND PARTITIONED != 'YES' AND TABLE_NAME NOT IN ('RETAIL_TRANS', 'WHOLETRANS');

BEGIN
        FOR REC_PARTITION IN CUR_PARTITION LOOP
                DBMS_STATS.GATHER_TABLE_STATS(
                          ownname => 'SUVIN',
                          tabname         => REC_PARTITION.table_name,
                          partname        => NULL,
                          estimate_percent        => 100,
                          block_sample    => FALSE,
                          method_opt      => 'FOR ALL COLUMNS SIZE 1', -- including column stats, without histograms
                          degree          => 4,                          -- running parallel for partitioned tables with degree of 4
                          granularity     => 'ALL',                     -- global, partition, subpartition stats
                          cascade         => TRUE,                  -- including index stats
                          stattab         => NULL,
                          statid          => NULL,
                          force           => TRUE,
                          statown => NULL);
        END LOOP;

        FOR REC_NONPARTITION IN CUR_NONPARTITION LOOP
                DBMS_STATS.GATHER_TABLE_STATS(
                          ownname => rec_nopart_tab.owner,
                          tabname         => rec_nopart_tab.table_name,
                          partname        => NULL,
                          estimate_percent        => 100,
                          block_sample    => FALSE,
                          method_opt      => 'FOR ALL COLUMNS SIZE 1',  -- including column stats, without histograms
                          degree          => NULL,
                          granularity     => 'DEFAULT',
                          cascade         => TRUE,                                -- including index stats
                          stattab         => NULL,
                          statid          => NULL,
                          force           => TRUE,
                          statown => NULL);
        END LOOP;
END;
/
Gathering Table statistics in Oracle - DBMS_STATS.GATHER_TABLE_STATSSocialTwist Tell-a-Friend